The countdown to Valentine's Day is on, friends. Some people are expecting to be wined and dined, some just order a pizza and watch terrible movies, and some are facing this year solo and going for sushi with friends. However you celebrate (even if you don't celebrate at all) you're still going to be completely assaulted with flowery images of hearts and winged cupids everywhere you look. Including here. You can't fight it.
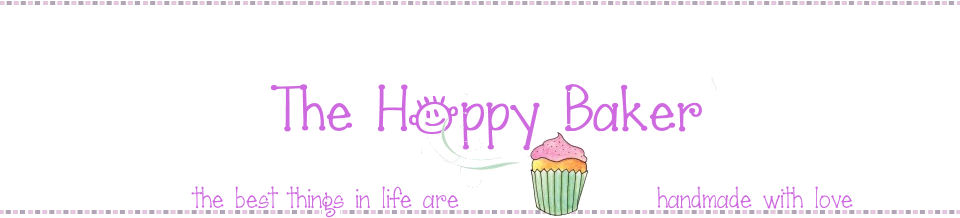
But when those assaulting images are as amazingly adorable as these little chocolate cake pops, how can you possibly not swoon just a wee bit?
Now, if I were making a cake to eat and be enjoyed as a cake, I would make it from scratch. However, cake pops are labor intensive enough without having to go through the trouble of making a cake in just the right proportions and whipping up homemade frosting, especially when it's just going to get all mushed together. So, by using a mix and canned frosting, I save a ton of time and it still tastes pretty darn great.
So, what will you need to make these adorable little bites of bliss?
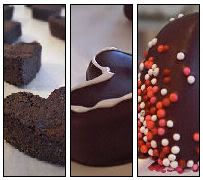
You'll need one boxed cake mix in the flavor of your choice, and the ingredients to prepare it. You'll also need a can of frosting in a complementary flavor. (For these, I used chocolate on chocolate).
Duncan Hines makes kosher dairy cake mixes, and the Pillsbury frosting I used is OUD. Recipe is, of course, vegetarian.
For dipping and decorating, you'll need:
- 1 bag of Wilton Candy Melts (I used dark cocoa flavor. Also best for novices, and I'll explain why later)
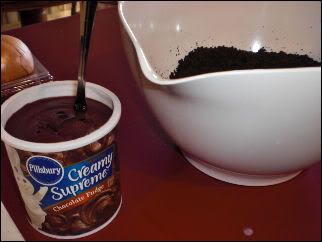
- 1 package of 50 lollipop sticks
- 1 semi-spherical piece of floral foam
Keep the plastic on the foam. This way, any chocolate drips are easy to wipe up and you can reuse it later.
- Sprinkles or candy decor
- Icing for piping (optional)
A trip to a craft store may be in your future. You can get all of these items at Michael's or Hobby Lobby.
 .
.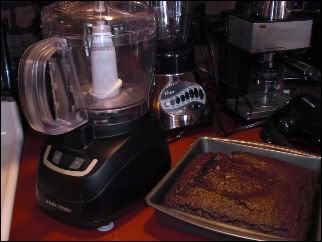
First, make your cake according to directions on the box. I made mine in a 9x9 pan.
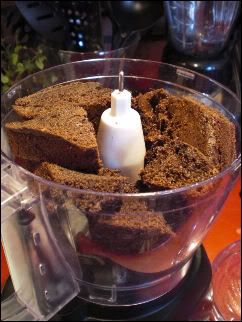
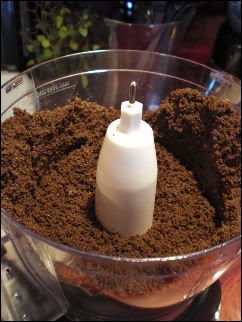
Then, trim off any hard, crunchy edges and slice into chunks. Puree those chunks in a food processor until the cake is reduced to fine crumbs. It may take a couple batches to grind down all of the cake.
 .
.
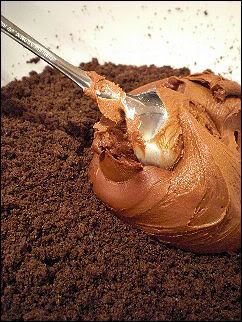
Transfer crumbs into a large mixing bowl and add half your can of frosting. Mix well with a spoon until well incorporated. The texture should resemble damp dirt and be moldable, like clay.
 .
.
Turn out your ball of "dough" onto a clean work surface.
If you plan to just roll the 'dough' into balls, skip the next step. Just pinch off pieces of the cakeball center and roll. However, if you want to cut them out with a cutter and make them into shapes, then continue...
Form into a solid ball and press flat into an even circle. It should be between 3/4" - 1" thick.
 .
.
I used small 1" cookie cutters that I bought at Michaels. They came 6 to a box, and have two different heart shapes, a daisy, a tulip, a bell, and...um, something else. I'll be using the hearts and the daisy.
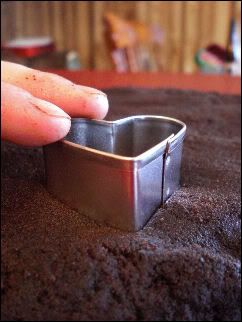
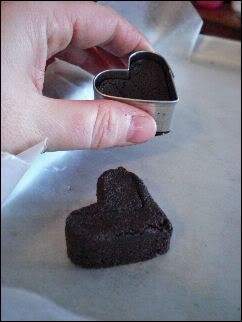
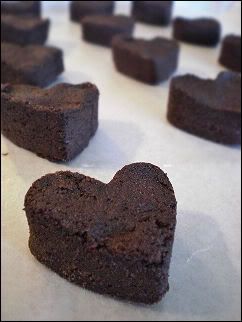
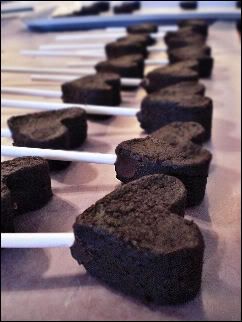
Press the cutter into your "dough" and lift quickly, straight up. The cut shape should stick inside the cutter. Gently use your fingertips to press the shape out of the cutter and set aside on a cookie sheet lined with wax paper. Continue to cut out shapes, re-rolling your "dough" as needed until it's all used. Try to resist eating all the shapes. I know, they're delicious!
 .
.
Stick your cookie sheets into the fridge or freezer while you prepare your dipping chocolate. The chilling process helps keep the shapes together so they don't fall apart when you dip them.
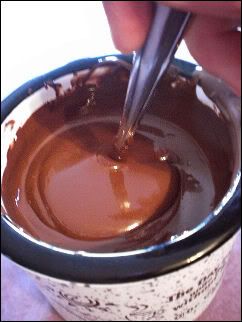
I recommend starting with dark cocoa flavored candy melts because, unlike the colored variety, they are made from actual chocolate and melt smoother and thinner, creating an easier dipping experience. The colored melts are actually tinted white chocolate and are much thicker and can result in a frustrating, uneven finish. Best to save those for when you have cakeball-dipping down to an art.
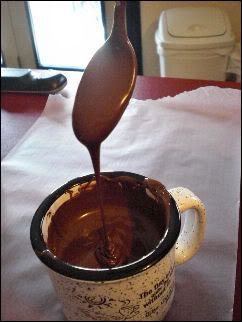
Empty your melts into a deep, heatproof container. I used a large, tall mug. Microwave for 1 minute at a time until fully melted, stirring between heating. You want it smooth and liquid, with no lumps.
 .
.
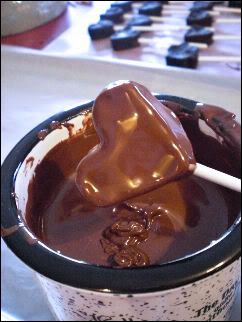
Once you have a mug full of smooth, melted chocolate, remove your cake pops from the fridge and open your package of lollipop sticks. Dip one end of the lolly stick into the melted chocolate (you don't need a lot) and insert the stick into the bottom end of your cut shapes. I find it works best to hold the shape down on the counter with the heel of my hand while inserting the stick. This helps keep from tearing the delicate shape apart. When all sticks have been inserted into your cake pops, return to the fridge to let them set, about 5 minutes.
 .
.
::Taps foot, waiting impatiently::
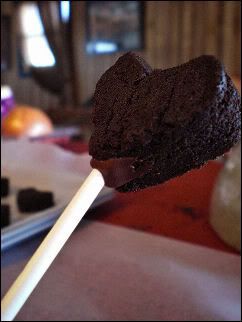
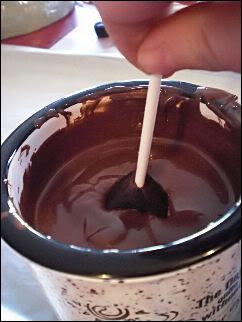
Okay! Give your chocolate a good stir again. and carefully dip your pop straight down into the chocolate, making sure it covers the entire pop, all the way to the stick. The word of the day here is "gentle". Gently withdraw it from the chocolate, give it a gentle twirl, and tap the stick (gently!) on the edge of the mug to allow excess chocolate to drip off.
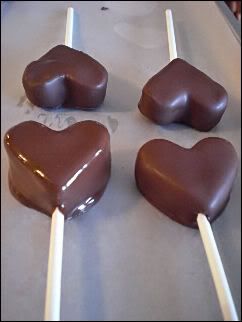
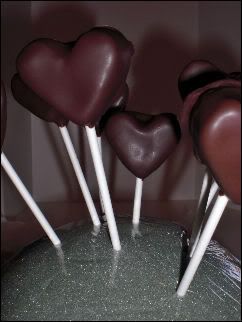
Now, you can either let the chocolate set by placing the dipped pops onto your waxed cookie sheet, or you can stick them vertically into your foam base. For cut shapes, either method works. If you're rolling your cake into balls, though, I definitely recommend standing them in the foam.
If you place your shapes on a cookie sheet and the chocolate puddles unattractively around them, use a toothpick to draw a separating line between the pooled chocolate and the cake ball. That way, when the chocolate has hardened, you can easily break off the excess.
 .
.
 .
.
If your cake pops start to fall apart as you dip them, return them to the freezer for a few minutes to firm up. Remember, be gentle. It IS valentine's Day, after all. You have to be sweet to these cake pops. Woo them.
Now, to decorate.
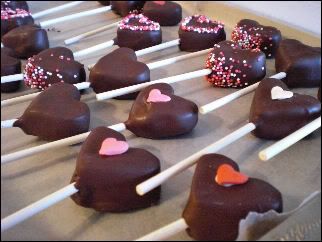
You can either add sprinkles or whatever while the candy coating is still wet, or you can "glue" on the decor with extra melted chocolate after they've already set.
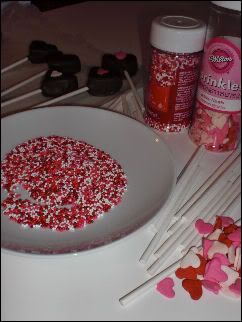
I did a bunch of different things.
I added little candy hearts with a drop of royal icing...
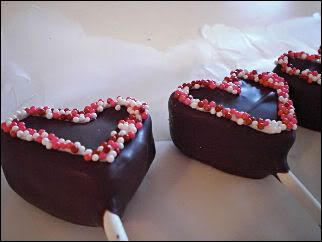
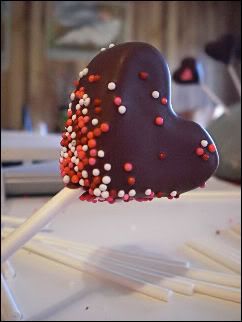
I drew little lines of royal icing and dipped them in nonpareils...
 .
.
 .
.
I simply embellished plain chocolate with more chocolate...

Make them yours! Let your heart go crazy!
In the end, you can enjoy them yourself, or they make excellent gifts. Your recipient is sure to LOVE them. And you.
Happy Valentine's Day, and happy eating!

I think some of those have my name on them!!!! Yummmmmmmmy!!
ReplyDelete